
Tools and Signposts
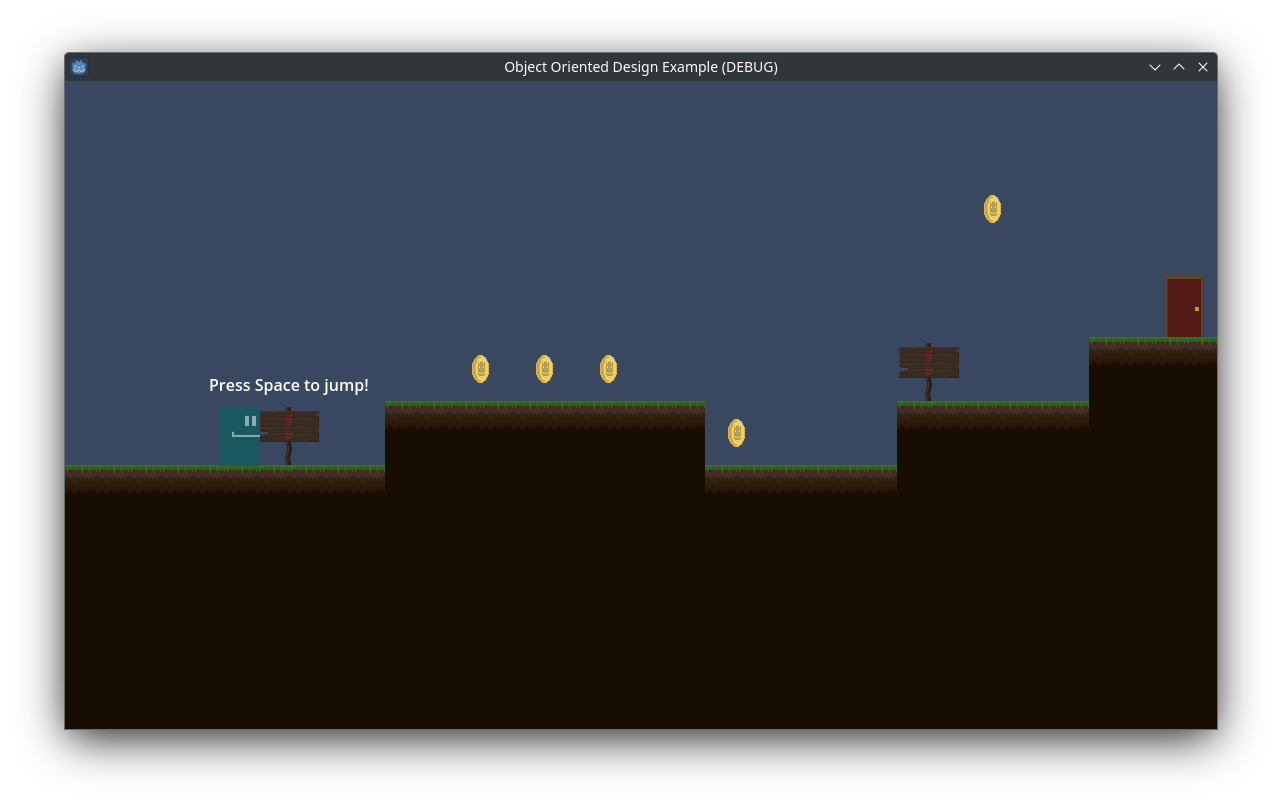
In this part of the series we're gonna look at an example of creating tools for our game and level designers. This is often one of the most important parts of your games framework, because without a proper tooling, creating the game is going to end up being a chore. Since we want to keep the code clean and organized, we will be updating the code we already wrote for our coin a little bit to allow for additional functionality that we can re-use across our code. In this part we'll be looking at adding a signpost to the game, that will display some text when the player comes close to it. This can be used to give the player some information regarding controls, the story, hints, tips and directions.
First off we're going to plan out how this functionality will work and how it would look in pseudo code, this will help us visualize the steps we need to take to update our project and make sure we don't miss anything important. So here's the description of how this is gonna work. A detailed description of functionality is also called a "Specification" in the software world, so this is our Signpost specification:

Scene: Signpost.tscn
Script: Signpost.gd

Functionality:
1. Displays a text when the player approaches it
2. Hides the text when the player leaves it
And this is how the pseudo code might look like for a signpost:
#Signpost.gd
func touch():
  Show Text

func leave():
  Hide Text
We want to integrate this with our coin functionality. Since the touch function is very similar to our pickup() function, we're gonna be working with that. However now the function naming doesn't fit it very well! We don't want to pickup a sign, we only want to react to touch() or approach(). Function naming is an important part of keeping your code clean, but we also want to avoid unnecessary code duplication, so we're going to change our pickup() function to touch() in this case. This is called "Refactoring" your code, when you have to change a piece of code while maintaining functionality intact. So let's first update our coin and player code to use touch instead pickup:
#Coin.gd
func touch():
Globals.coins += 1
$SE_Pickup.play()
await($SE_Pickup.finished)
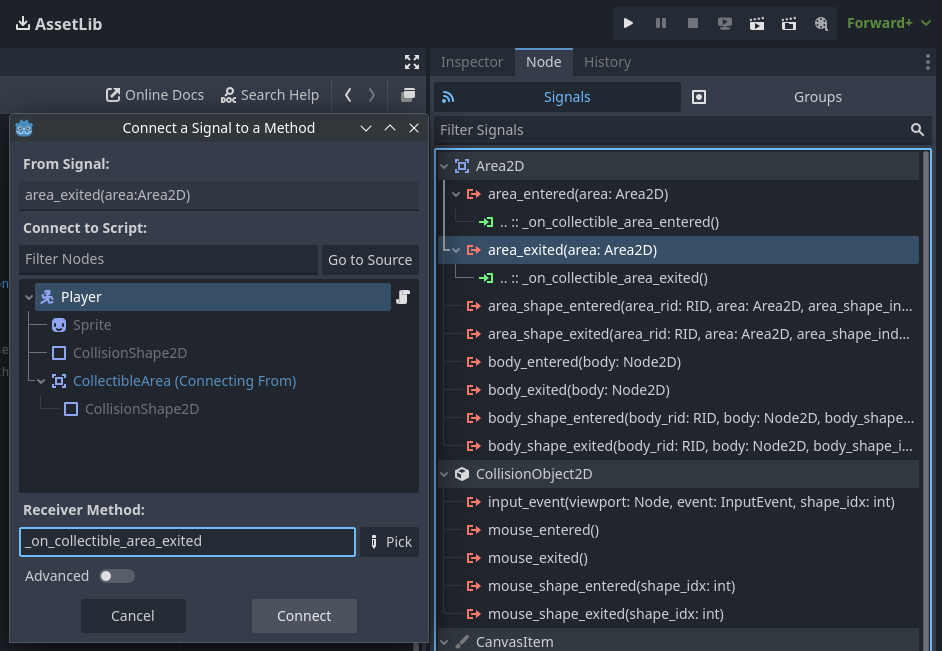
queue_free()While we're doing this, we'll also connect a new signal to the players collectible are: the "area_exited" signal. As before you can click the Area2D node and in the right side inspector panel go to the "Node" panel and double click the "area_exited" signal. Here the method name will be _on_collectible_area_area_exited Go ahead and delete the extra _area part so that the function name is nice and readable and click "connect", this will automatically create and connect the signal the a function in the Player.gd script.
We'll use the same code as for our area_entered here, but instead of calling "touch" we call a "leave" method if it exists in the parent.
#Player.gd
func _on_collectible_area_entered(area):
	var parent = area.get_parent()
	if parent.has_method("touch"):
		parent.touch()

func _on_collectible_area_exited(area):
	var parent = area.get_parent()
	if parent.has_method("leave"):
		parent.leave()
And with that we migrated the coin to the new function name and we also pretty much finished the core functionality of our Signpost. All that we have to do now is create the signpost scene and implement those two methods for it to work.
Signpost Scene
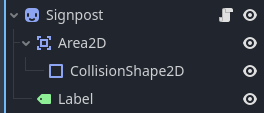
The scene file is going to be pretty simple, all we need is a sprite node for the signpost itself, an Area2D to detect the player collisions and a Label to show the text. A basic setup will look like this:
Now we can style the scene, place the Signpost in the center and above the X axis, this is because we want to be able to snap the signpost to grid when designing our level and for that it should match the ground, next we create a CollisionShape2D for our Area and set it to our desired size, when the players CollectibleArea and this area touch, that's when the signpost will react. And lastly we'll center the label above the signpost.

With this done, we can start working on the Signpost.gd script, so go ahead and create one and attach it to the signpost root node. Since we already have our pseudo code done, we can just use that to write the actual code, all we need to do is display and hide the label for now:
extends Sprite2D

func touch():
  $Label.visible = true

func leave():
  $Label.visible = false
This is the most basic functionality for our Signpost. However this only displays a pre-set message, and we want many signposts, all with different texts. This is where creating tools comes in. First of all we need to make the text changeable in the level editor. You can do this by using the @export annotation in Godot4 or export in Godot3. There are many types of exports, the simplest one @export simply exports your variable to the Inspector panel so that it's editable there, this allows you to change a variable for every node/scene instance individually. So for starters we can use this and see what it does for our signpost:
extends Sprite2D
@export var message: String
func touch():
$Label.visible = true
func leave():
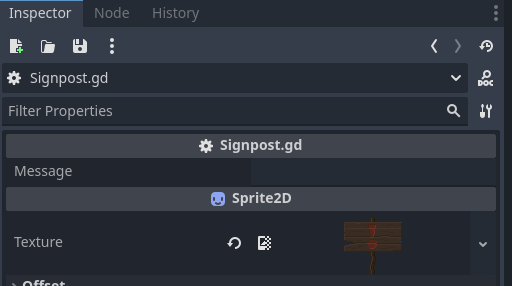
$Label.visible = falseNow if we select the root node of our signpost we can see a "message" field appear in the inspector:
This is nice, but changing this right now doesn't do us any good because the value is not being used anywhere. The simplest way to actually use the message is to set it up in the _ready function using our exported variable. Here we can also set the Label to invisible. We could do it by clicking the eye icon in the scene graph, but here's the thing. We want to be able to see the text in the level editor while designing the game, so we see how it will look like, but we don't want to see it on in the actual game if the player isn't near it. So for this reason it's better to make it invisible at the start of the level rather than in the scene tree itself:
extends Sprite2D

@export var message: String

func _ready():
  $Label.visible = false
  $Label.text = message

func touch():
  $Label.visible = true

func leave():
  $Label.visible = false
Now if we create a couple of signposts in our level we can see they all still display the same text and don't react to changes to our message, but if we run the game, they are going to work correctly and each is going to only show the text that we put in the message field in the editor!
Now, we'd like to see the actual text in the editor while editing the levels. This will allows us to catch any text formatting errors, typos or possible bugs and issues with the signpost early on, without having to start the game every time we change something. This is also much more intuitive way to build a level for any level designer. To do this, we have to use the @tool annotation in Godot4 and tool in Godot3.
Once you make a script a "tool" it will start executing code even in the editor.
There is no danger for what we're going to be doing though. We just want to update the text in the label when it changes directly in the editor view. For starters we can do it the naive simple way so then we can explain why it isn't a good idea:
@tool extends Sprite2D

@export var message: String

func _ready():
  if not Engine.is_editor_hint():
    $Label.visible = false
  $Label.text = message

func _process():
  $Label.text = message

func touch():
  $Label.visible = true

func leave():
  $Label.visible = false
Here you can see a couple of changes:
- We added the @tool annotation at the top
- We added a condition
if not Engine.is_editor_hint():before our visibility setting - we set the text in the _process() function
First of all, we had to add the editor hint condition because when our script is a @tool now it's also executing the _ready() function. But as mentioned before, we need to have different behavior for the editor vs. the game. Godot gives us this information via the Engine class and it's is_editor_hint() function. This returns true if we're in the editor and false if the game is being played.
Secondly, we update the text in the _process function, which means this code runs every frame even in the editor. This will work perfectly fine, however this also results in some heavy code execution, if you have a lot of signposts in your level, they all have to run code all the time, which can make your editor laggy if you do this a lot. It wouldn't be a problem for our simple game, but still, we're going to see how we can mitigate this issue and code this in a clean and efficient way. For this we need to see the get/set functionality of variables. See in godot, whenever you change or read a variable, even the exported ones, a secret function called a getter or a setter is being executed to actually fetch the value or update the value of the variable. Godot allows us to override these functions to perform some extra functionality. We're going to leverage this, and only update the text of our Label when the value changes. You can read more about this here for Godot4 and here for Godot3. There's a bit of difference in syntax between G4 and G3 here. I'm only going to cover the Godot 4 example, but you should be able to adapt it to Godot 3 easily if you read the docs linked above.
What we're going to be doing here is creating a function to update the text and then use it as an override for the set method of the message variable like this:
@tool extends Sprite2D

@export var message: String: set = update_text

func _ready():
  if not Engine.is_editor_hint():
    $Label.visible = false
  $Label.text = message

func touch():
  $Label.visible = true

func leave():
  $Label.visible = false

func update_text(value):
  message = value
  $Label.text = value
Now when we update the text in the message field we should see the change directly in the editor in real time! One thing to note with this approach is that we had to set the message variable to value in the setter. This is because the setter is responsible for memorizing the value, if we don't do this, then upon reloading the scene or the project the texts would be gone because there were never written out to the exported variable. So this is just something to keep in mind when working with setters.
Anyway, now our level in the editor looks like this:
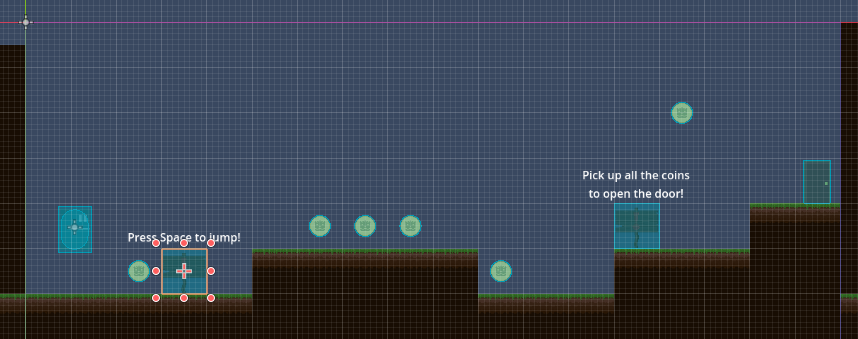
But if you run the game, the texts are going to be hidden and only appear when the player touches them! This is pretty much all we wanted and it's all done and reusable. Now you can re-use this same approach for any other game item, for example a chest, that displays a "Press [E]" when the player approaches, or a door in a building that shows "Enter Bob's house` when the player approaches. Alternatively you can do any other action on touch/leave here as well, like hurting the player while walking over spikes, or playing an effect when the player stands on a teleport before moving them and so on...
Enhancements
This is not a mandatory section of the tutorial to follow, but there are a couple of things to improve upon our Signpost even more:
- We're using the
@exportannotation for the message right now, but signposts might want to display a multi-line message. For this Godot gives us another export type with@export_multilineThis will show a text edit field in the inspector instead of just a line edit field. - We can add additional effects to the sign text to make it more enjoyable and also to show how easy it is with our current setup. All we need to do is create a Tween that will tween the "visible_ratio" property of our label.
Here's an example of the finished script:
@tool extends Sprite2D

@export_multiline var message: String: set = update_text

func _ready():
  if not Engine.is_editor_hint():
    $Label.visible = false
  $Label.text = message

func touch():
  $Label.visible_ratio = 0
  $Label.visible = true
  create_tween().set_trans(Tween.TRANS_LINEAR).tween_property($Label, "visible_ratio", 1.0, 0.5)

func leave():
  $Label.visible = false

func update_text(value):
  message = value
  $Label.text = value
Now when the player comes to the signpost, it will be quickly typed out instead of shown all at once, which adds just a little bit of flair to our game.
Conclusion
That's all for this part! I hope you have a better understanding of how and why we create tools, not only for ourselves but also for other members of our team that might be working on the game. Creating the proper tools and helpers can help you to keep your level design easy and clean and keep making the game an enjoyable experience rather than a chore full of spaghetti code and hard-coded values.
The next part will be all about signals, and how to manage our level events and level transitions!

